Row | Instruction | Total |
|---|---|---|
1. | 3 sc into a magic ring | (3) |
2. | 3 inc | (6) |
3. | (inc, sc) * 3 | (9) |
4. | 9 sc | (9) |
5. | (inc, 2 sc) * 3 | (12) |
Finish with a sl st, bind off and leave a long tail for sewing later. | ||
Row | Instruction | Total |
|---|---|---|
1. | 7 sc into a magic ring | (7) |
2. | 7 inc | (14) |
3. | (sc, inc) * 7 | (21) |
4. | (2 sc, inc) * 7 | (28) |
5. | (3 sc, inc) * 7 | (35) |
6. | (4 sc, inc) * 7 | (42) |
7-12. | 42 sc | (42) |
13. | (4 sc, dec) * 7 | (35) |
14. | (3 sc, dec) * 7 | (28) |
15-16. | 28 sc | (28) |
17. | (2 sc, dec) * 7 | (21) |
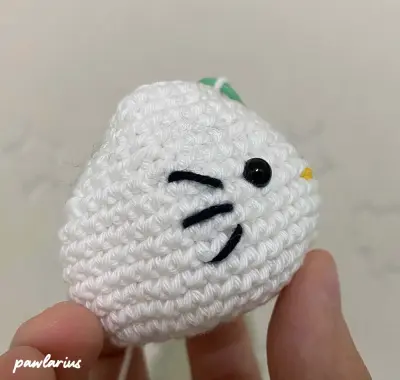
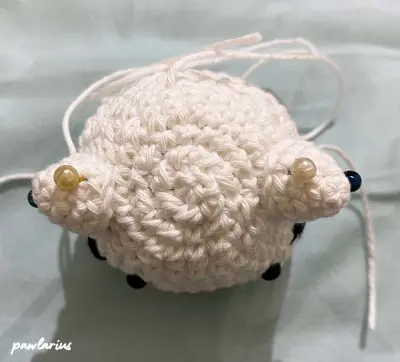
You can put safety eyes / embroider eyes with yarn around Round 10-11 with distance around 7-8 stitches.
Use cotton yarn yellow to sew a small nose between the eyes.
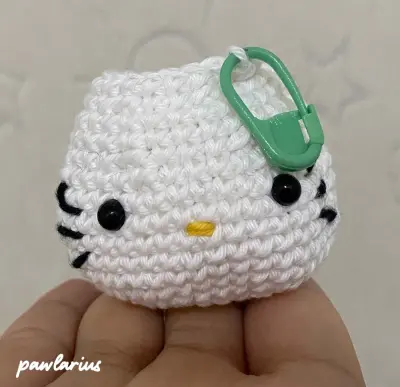
Use cotton yarn black to sew a 3 whiskers in the left and right side of the face.
Row | Instruction | Total |
|---|---|---|
Start stuffing the head. | ||
18. | 21 sc | (21) |
19. | (2 sc, dec) * 7 | (14) |
20. | 7 dec | (7) |
Finish with a sl st, bind off to close circle and leave a long tail for sewing later. | ||

Row | Instruction | Total |
|---|---|---|
1. | 6 sc into a magic ring | (6) |
2. | 6 inc | (12) |
3-9. | 12 sc | (12) |
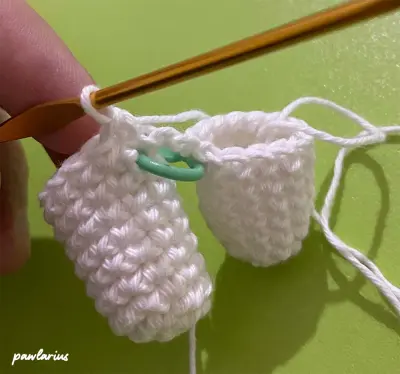
For the first leg, after reaching Row 9, stop there and cut off the working yarn. When working on second leg, after reaching Row 9, DO NOT cut off, but continue with instructions below. | ||
With second leg, start by add stitch marker to the last stitch from Round 9 in the second leg. Make 3 chains (later I will call this "chain bridge") & join to first leg by making a single crochet in its first stitch.
Continue with single crochet from first leg until reach the 3 "chains bridge" from earlier. Make 3 sc in side of that "chains bridge".
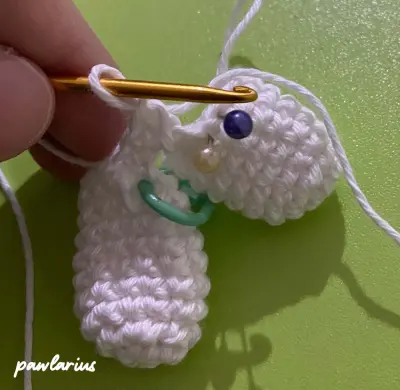
Then continue making single crochet in the second leg until you reach the "chains bridge". And make 3 sc in the other side of the chains bridge like earlier.

Continue doing sc until you arrived at the stitch marker from earlier & have 30 stitches now in total.
Row | Instruction | Total |
|---|---|---|
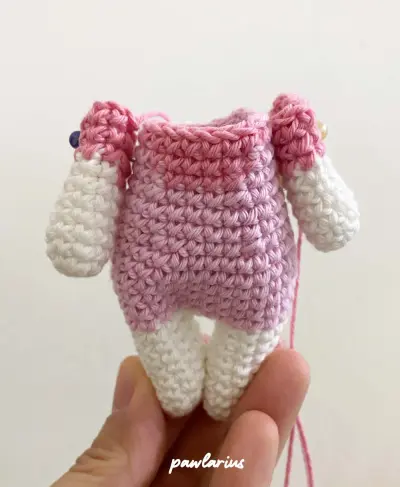
11. | White: 30 sc | (30) |
12. | White: 6 sc Pink: 24 sc | (30) |
13-17. | Pink: 30 sc | (30) |
18. | Pink: (4 sc, dec) * 5 | (25) |
19-20. | Pink: 25 sc | (25) |
21. | Pink: (3 sc, dec) * 5 | (20) |
Start stuffing the legs & body. | ||
22. | Pink: 9 sc Dark Pink: 4 sc Pink: 7 sc | (20) |
23. | Pink: 8 sc Dark Pink: 6 sc Pink: 6 sc | (20) |
24. | Pink: 7 sc Dark Pink: 8 sc Pink: 5 sc | (20) |
Finish with a slip stitch, leave a long tail for sewing | ||
Row | Instruction | Total |
|---|---|---|
1. | White: 6 sc into a magic ring | (6) |
2. | White: (inc, sc) * 3 | (9) |
3-8. | White: 9 sc | (9) |
9-12. | Dark Pink: 9 sc | (9) |
Use stuffing materials and fill lightly. Finish with a sl st and leave a long tail for sewing. | ||
Row | Instruction | Total |
|---|---|---|
1. | 3 sc into a magic ring | (3) |
2. | 3 inc | (6) |
3. | (inc, sc) * 3 | (9) |
Finish with a slip stitch, leave a long tail for sewing. | ||
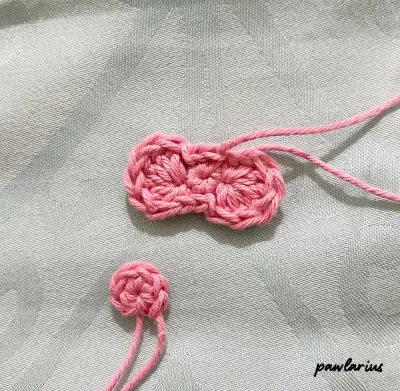
Row | Instruction | Total |
|---|---|---|
1. | 6 sc into a magic ring | (6) |
2. | (6 dc in a single stitch, 2 slst) * 2 | (12) |
Finish with a slip stitch, leave a long tail for sewing. | ||


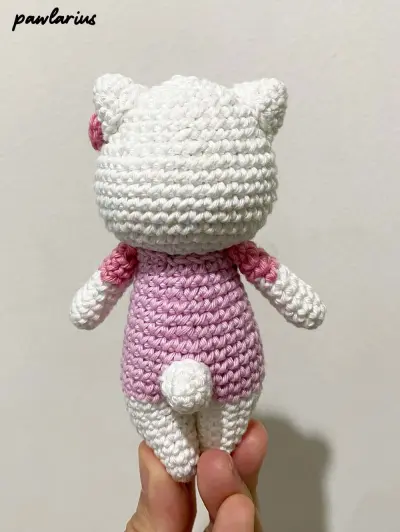
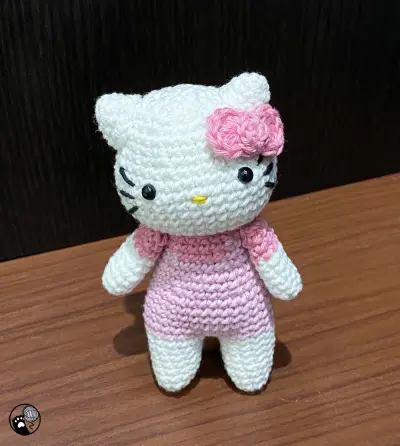
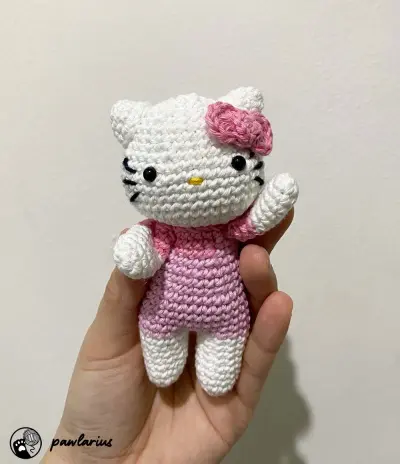
There you go, a mini cute Hello Kitty~